Painting with Paulson
Brenna and Her Shadow Part II
3/1/2025 | 26m 46sVideo has Closed Captions
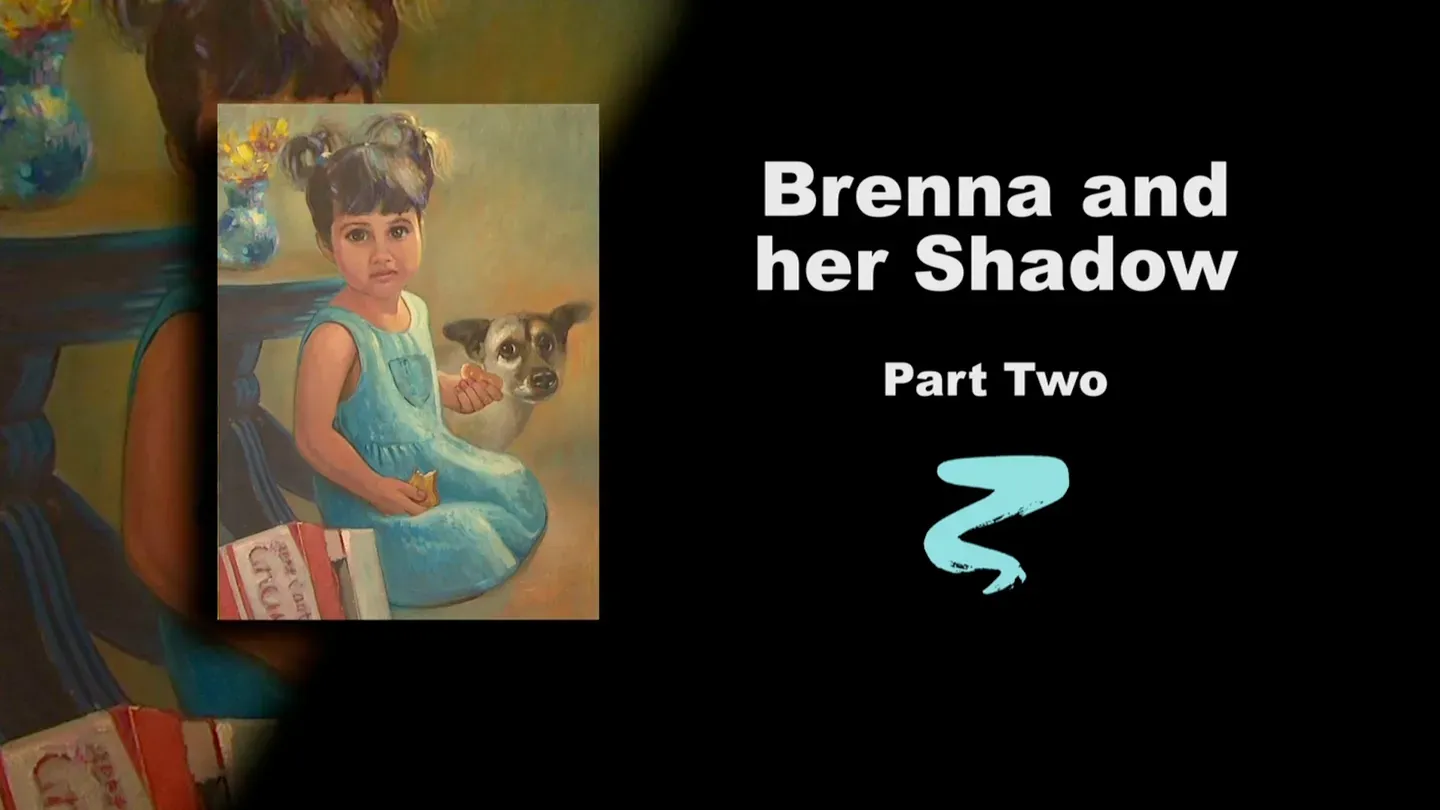
Buck adds color to the little girl in stage two of Brenna and Her Shadow.
In stage two of Brenna and Her Shadow, Buck uses oil paints to add color to the little girl and bring her to life.
Problems with Closed Captions? Closed Captioning Feedback
Problems with Closed Captions? Closed Captioning Feedback
Painting with Paulson is a local public television program presented by Prairie Public
Painting with Paulson
Brenna and Her Shadow Part II
3/1/2025 | 26m 46sVideo has Closed Captions
In stage two of Brenna and Her Shadow, Buck uses oil paints to add color to the little girl and bring her to life.
Problems with Closed Captions? Closed Captioning Feedback
How to Watch Painting with Paulson
Painting with Paulson is available to stream on pbs.org and the free PBS App, available on iPhone, Apple TV, Android TV, Android smartphones, Amazon Fire TV, Amazon Fire Tablet, Roku, Samsung Smart TV, and Vizio.
Providing Support for PBS.org
Learn Moreabout PBS online sponsorshipWhen I first met my wife she said I reminded her of a big floppy dog!
I've been on a short leash ever since!
[piano plays in bright rhythm & tone] ♪ ♪ ♪ ♪ Welcome to my doghouse!
[laughs] There was an artist used to say, "welcome to my studio."
See how I welcomed you?
Let's go ahead and do part 2 of "Brenna and her Shadow."
[with a deep voice] As we have left you before, we have finished the acrylic stage.
Now we're going on with the oil stage.
Part 2.
Then Part 3 will be a little more finish and polish.
I will dip into the walnut oil with my large bunny brush.
I already started just a little bit, and I'll just continue with this.
Although we're not going to give the whole painting a bath, it makes it so I don't have to keep using medium.
It works very well.
I do like the aspect of always smoothing it out a little bit, making sure that I don't have too much of the walnut oil on.
And also making sure that I have coverage.
All bases coverage!
Don't you like that baseball term?
I do too.
Let's go to the palette, and I have mixed 1 part Alizarin Crimson, 1 part Yellow Ochre, 1 part of white.
This will be our flesh color, and it will be the dark flesh.
Then we'll show you what we do for the next.
When we put on the dark flesh you can kind of see where the position is, where we had previously placed on the acrylics.
I appreciate you coming back.
And you can do this painting, the style, the technique, the color formulas, with one of your children.
This is my granddaughter, Brenna.
And that's our dog, Shadow.
So when I say Brenna and her Shadow, it's her Shadow when she comes, because that dog goes to no one else.
Now I'm coming over very closely to the outline, which was done with Alizarin Crimson acrylics.
But I don't mind just seeing a little bit.
It gives an indication that I truly am in the boundaries.
Oops, I think I hit you in the eye.
On no, I didn't.
A little bit in here.
So I'm merely following what was done before as far as placement of the shadow color.
Here you might ask, ok, are you making use of that underpainting?"
Yes, because I want to make sure I have softness and quality in the paint, I'll just touch a little bit, that removes a little bit.
And surely what is underneath is kind of helping on the finished look.
It has a shadow color without being hard.
I love that feeling where you get colors playing through each other.
That's what I define as quality, color quality.
I'm not saying that one painting is better than another.
It has more quality.
There's different expressions for quality, I guess.
Ok, coming down on the neck, on the shoulder, and on the throat.
Isn't that funny when I do this I almost feel myself, I was touching her throat, and I felt mine.
I felt choking!
What's that?
I don't feel any choking.
But it is, it is a quality that is nice to acquire, where you feel you're working right on her cheek.
Right on her cheek, on the chin.
I can almost feel that firmness underneath.
She must have received her Grandma's chin, because that's not Grandpa's chin.
I do continue with the idea of putting it on, then wiping it a little bit.
And I have more control when I put the walnut oil on then wiping the walnut oil, so that now when I come and wipe a little bit with the paint, I still retain it.
That is very necessary, or very helpful.
Otherwise there's real running and you start wiping, you're going to lose it.
And if you lose it, you will really lose it.
Geeh, that's a nice flesh color.
Just dip into the same thing.
I have a brush that is, what are you?
You're a badger, badger flat.
That is a great brush for covering areas for softness, larger areas, and it's also a great little leaf brush.
Sometimes when I put this on I'll just soften that edge, like that, so it's closer to the refined look before we come with the next color.
Going back to the idea of wiping a little bit.
Oo, let's go on this side too.
See how that greenish tone is there.
Now we cut down into that a little bit, and I'll further go down with just a little bit in here.
When I go in there, there is still a little gap between the two.
Now we'll wipe.
And you have another hand, the hand with the cookie!
Do we have that cookie today?
Nope.
Shadow got it!
He loves to eat.
Wipe just a little bit on that.
Alright, now I'll take the next color.
And the next one-- I think I'll use the same brush.
The minute I said that, I'm changing my mind.
I'm going to go down to the badger, filbert.
And we'll come down to the next color.
This is just a little cooler.
I put just a little Van Dyke Brown in it.
This will be sort of a secondary color.
You can see it's lighter, but it doesn't have all the final highlights that will be indicated where you can see the lights now.
But this will go over them, then we'll see about where we go lighter.
Some places we won't go lighter, some places we will with the next value.
Right under there, where a boy would have a little moustache.
A little girl does not.
What's so neat, even though the eyes are unfinished, I can feel her looking at me.
Somebody will say, I went in and saw this portrait.
It followed me wherever I went across the room.
You know how you do that?
You make so they're looking strait ahead, and then wherever you go, they follow you.
That's such a simple thing, but boy, you get a lot of simple things on these shows!
There's right on the edge.
Again, we're showing where the light's coming from, so when we're putting these on we're building what we call our "middle tone," then we'll come with our lightest lights.
But I can go very faintly on this, and I can still make use a little bit of what's put on there with the acrylic light.
Isn't that a nice little flesh color?
Let's use a larger brush.
This is back to the one we used earlier for the shadow color.
The reason I'm using this is, it goes faster when we're doing a large area.
Although it may have been funny, it was absolutely true.
My wife did think I reminded her of a big floppy dog.
I used to have a lot of hair, like one of the camera guys.
But anyway, when I went to my senior class picture shoot, where you go individually and have your picture taken for the annual, this was at college, and I came in and the fella said, "Do you want to comb your hair first?"
I said, "No, that's the way it always looks."
So he did it.
He took it that way, and to this day, I think maybe I should have combed it!
Alright.
There we are.
And over on the hand a little bit like that.
Ok, what I want to do is block in a couple of things first, then we'll come to the eyes.
When we do this, it would probably be helpful to have a little bit of the hair, which is different.
It's going to be a different color than the red.
So this will make a large change.
I have the flat brush, I cleaned it with the walnut oil.
This is Van Dyke Brown.
I'll push a little bit here.
We'll be working things into the Van Dyke Brown, but for now, it's quite dark.
And truly on that side of the hair is in shadow.
When I come down next to the flesh, you can say generally you want to be very careful.
You don't want to bang into each other, but just the opposite here.
I want the hair to touch into the flesh.
And it will soften the edge of the hair.
Now this spot, I need to go just like that.
Then feel like there's shadow, flesh right there.
Come across the lights with the same glaze of the Van Dyke Brown.
You can see I saved their position so I know where they are and I can work with them.
A little bit more Van Dyke Brown.
When we have a little bit of paint in the background, then we'll be able to soften some of these edges into it.
Right now they're just a little firm.
I don't mind, and as I look at the-- this is not the original, this is the completed second stage, I can feel still a little bit of the red.
Which is very choice, and whether I've left too much or not now, I'm not overly concerned with, but I have left some.
Ok, let's go to a couple of other places, then we'll come back to you, sweetie.
Could I change my mind?
Could I work on her?
Yes, because I want to make sure that you see this.
That really makes sense.
So let's go ahead, still with Van Dyke Brown, I have a round brush.
I guess, well, it's clean, so I didn't necessarily wet it.
But this is coming up quite dry like.
And when I first put this on, I'll make just a little touch by the eyebrow on both sides.
And see, they're much larger than that, but then I'll wipe the brush, how'd you get out there, dirty?
Dirty, dirty, dirty?
I will take and push it a little bit, which will go into the wet flesh color, and we'll soften them very much.
Now she, Brenna, has very dark hair, very dark eyes.
Just absolutely gorgeous.
So that softens, you can see how that softens, and then we'll come on this side.
And you watch the characters.
See, this just has a nice little arch.
This one is a little bit different, it's funny.
It comes and it kind of goes up a little bit and then down.
You don't want to make too many real extreme variations when you have them, but you have to nevertheless paint the person that you're commissioned to paint.
If this were a commission where you are being paid for it, well then you make them look good.
Oh, its so fun!
Some people, [sighs] you love the paint them.
They take it home and they say, that doesn't look like you.
[laughs] That hurts!
I've used the example-- I'm going to go ahead and put the dark right above the eye-- when you paint a portrait, let's just say with Brenna, she's going to look different to her mommy and daddy, to her grandpa and grandma, to her teachers, to the mailman-- but they're all her!
But there's just a little different view they see.
Ok, I'm putting on both sides.
I'm kind of working back and forth.
Not calling either one done.
On this side, now I will come into the iris.
No, you're pupil, excuse me.
Pupil, and the pupil over here.
Now, I'll have a little bit of this as a surrounding on the iris here.
So you have a nice outline, both sides, then--isn't this great where you can see up close on this?
Oh, I love that!
Ok, I wipe the brush and I'll pull this in just a little bit.
So you're still feeling some of the red through there.
I see on that eye, when I say "that eye," her right eye, to our left.
I need to have a little stronger pupil.
A little darker, so this is back with the same thing, just a little stronger.
And there.
Now I'll take and I'll blend up just a little bit, like little eyelashes.
This one got a little wild.
Whether you have many eyelashes or not, the main thing is to soften a little bit into the above, so that line is more than just a line.
I'll come down a little bit on this.
A little bit on this side.
Of course, you're watching this, but watch this.
This is down the lower corner here.
This is yellow and white.
Watch what I do.
I take the brush, dip in... pull out.
See that little thread?
Gosh, I love that!
And where's the light coming from, from the right?
And you use the eye almost like a clock, and you say, I see that up there at 2:00.
That's a little quantity.
And then on this side, not as much.
We kind of feature one eye over the other.
And then there is an additional little reflected light.
And if you're talking clock again, what is that?
Eight o'clock!
I'll come back to this one, and I'll take just a little bit of the Van Dyke Brown, and I'm going to just take off that little tail that's right there.
Just take off that little tail.
Aw, sweetie, you look so good!
Alright, now I'll take a little bit of blue and white.
If you come down to the palette, I'm using Manganese Blue and white.
Just the smallest shading in the corner of the eyes.
So you get rid of that sharpness from that line we put above.
And we'll do one other thing.
Just the smallest yellow and white.
That's what we just put in the pupil in the eye.
And we're going to put just a little light down here.
Just a slight bit on both sides.
Ok, we better move on.
We'll take now, and let's see, let's do some large things.
Let's go ahead down to the dress.
And I'll take first just Manganese Blue, put a little oil with it, because it's just a little stiff on the brush.
I'm going into the shadow area of the dress.
Doesn't change it much, does it?
But it gives some softness.
And you find that even though you do cover, you find places that are peeking through a little bit.
So it gives just a little quality to the paint.
This is all on the shadows, not much.
And then we have this next color for the lights on the dress, is-- what are you?
Turquoise Blue and white.
Fan brush, and I'll just put this on.
Kind of drawing on the side of the brush.
You use a lot of little marks like that.
And in this case, more so than on the previous blue, you're letting some of the previous, you're letting some of the acrylics come through.
Just a little darker on that.
A little extra Turquoise Blue.
Yes, that's much better.
It was getting to be a little too light.
I love that broken color, the broken stroke.
The Impressionists used that very much.
So we can have some realism and some Impressionism in the same thing.
This truly makes the dress sparkle.
Poor Shadow, you're sitting over there, kind of as a monochrome, and you don't even know what that word means!
That's one color that is valued out from darks to lights.
That's a monochrome-- one color.
Ok, let's look just a little bit up in the hair.
I'll take some of that same blue I have been using on the dress, on the lights on the dress.
Let's just see if we can maybe, no, let's do it.
Let's do it this way.
Let's do it without wiping.
Yes, that's good, It's almost a kind of little grayish.
It's not that she's gray, but it's so surprising the different colors you have when the light shines on it.
A little bit over here.
Oh, very good.
Is there anything else?
I know.
You can't speak to me if you don't have a mouth!
Here is some of my flesh color, and I've added some red to it.
What kind of red are you?
You are Cadmium Red Light.
And this will give me just the soft little lips.
A little bit on the top.
When I'm doing the top one I'm putting just a little extra Alizarin back into the dark flesh color.
And I believe what I can do is just a little bit of just touching the lower one too.
Now I need 2 other things on the lips-- 1 is having a nice dark line through it, so this is the violet.
Quinacridone Violet.
Just a little line there.
Just come through.
Then down over here just a little bit.
I need to have just a little highlight on there.
I think what I'll take is some of ah, let's see, this is the light flesh color, and we have just a little bit of white in it.
Ok, that works.
Now I'm going to put just a little scrubs around.
We'll take, this is-- what are you?
You're Yellow Oxide, transparent Yellow Iron Oxide and white, and then I have just a little bit of orange in it.
This will give me some of my colors out here.
It's quite helpful to judge the flesh color when we have some of the background next to it.
We see what it looks like.
We'll spread that around a little bit.
We'll push some of this up like it's going to be the base for some of the flowers that will come the next time.
We just have a couple minutes left here, so we'll see what we do.
Now some of this, I don't really feel that I'm misleading you if I put this on and it isn't quite blended out and all that.
I just want to take and make sure that we're working on the things that need to be ready at this stage.
The other thing I would do is just take a pure Manganese Blue, and I have a fan brush, and I'll push this on, just a little bit on the table there.
And then I'll wipe it, which is not saying it's wrong, but just thinning it out a little bit.
Give it some polish.
Go polish the table!
[soft scraping] I have a mop brush, which is quite helpful.
The mop brush does a lot of the same work the bunny brush does.
But it just, I can work it in a smaller area.
Touch around.
Oh, this has been so good being you today!
And you come back.
We'll do stage 3, part 3 next time.
And you will find little Brenna coming alive.
Oh, and Shadow, he will come alive too.
So we'll see you then.
I hope that you've enjoyed part 2 of "Brenna and her Shadow."
And you can do it on either Brenna or one of your children.
♪ ♪ ♪ ♪ ♪ ♪ ♪ ♪ ♪ ♪ ♪ ♪ ♪ ♪ ♪ ♪ (woman) Funding for "Painting With Paulson" is made possible by...


Support for PBS provided by:
Painting with Paulson is a local public television program presented by Prairie Public